
Back in April, I spent a weekend creating a window box for my front porch.

Window before
I ran out of spare rough-hewn boards for the façade of my studio last fall,
and now that the weather’s mild I tackled this.
Just a piece of old plywood sufficed.

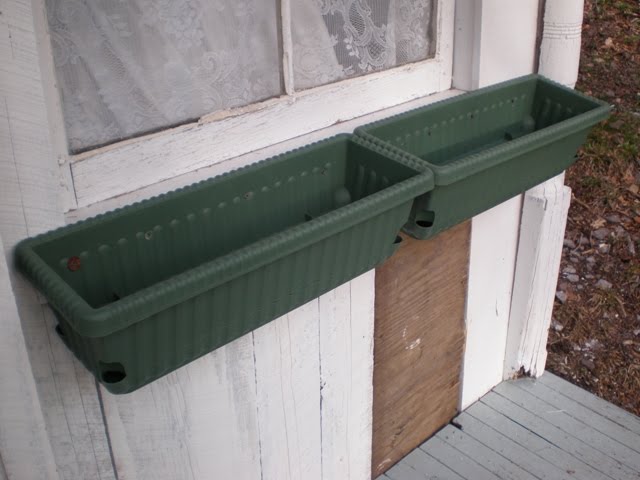
Then, I screwed the $8 window boxes I bought at the
Price Chopper grocery store on to get an idea where to build the ‘holder’.

It really helps to have a drill bit to pre-drill holes for screws.
The wood doesn’t split as easily and it hastens the fastening of the screws.
It’s easier to back them out as opposed to pulling nails if you make a mistake, too.
I make a lot of mistakes, so I’m always at Dubben’s Hardware in Delhi
getting half pounds of screws measured out on their antique scale.
I’m very lucky to have a lot of scrap wood left over from other projects.
My appliqués are handy, as is my rose-pattered china bowl of odd screws and tools.


The sides are cut with a circular saw, and go up courtesy of my pneumatic nailer
with 18 gauge nails, ($75 plus the $200 for the air compressor,
bought nearly 10 years ago when we began the huge renovation on our first house
saving us THOUSANDS in contractor bills).
It's there in the corner of the picture with its long orange hose.


Then, the trim and appliqués go on (with wood glue and a few pneumatic nails)
and the plastic window box inserts go in.
This is my favorite part of any project:
the moment it actually looks like something you had in mind!

Sunday morning, I am encouraged by Saturday’s progress,
and I hope to put that step to the door up at long last, too.
My little Maltese dogs can’t have ingress and egress without my assistance, you see.

Set up to paint with my pneumatic paint sprayer ($40) that attaches to my air compressor.
Actually, the sprayer cost $20 at Tractor Supply’s big Memorial Day sale last year,
and I thought I was getting a huge deal because they’re normally $40.
And then I learned I had to buy extra fittings at Auto Parts Plus to make it work,
so it was 40 bucks anyway.

And, your paint has to be thinned to use a sprayer, so you save on paint.
It’s great for chippy things because the chips don’t come off the
way they do when you use a paint brush or roller.
The set up and clean up is the longest part: the spraying took maybe a minute or two.
.jpg)
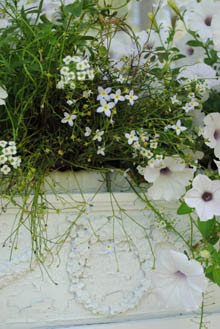
I set in my Bobo Pink myosotis – pink Forget-Me-Nots,
bought at my favorite farmstand Hanover’s of Mount Tremper, NY on Rt. 28.
April is way too cold to plant these fresh-from-the-greenhouse beauties.
I kept these indoors at night.
The wreath appliqué is $5.25 from The Bella Cottage,
and the swags are $10.95 each from Do-It-Yourself-Chic.

When mid-May arrived I finally planted some lilac-white petunias
(two hanging baskets I split in half, then planted in each window box)
and this new annual that looks like self-seeded white alyssum!
The bluets (Houstonia) are kept in their container so that I can plant them
in the grass after they finish blooming. I wish I had the money for a whole flat of them,
but they were $4 each. I grabbed some other goodies, like a lilac flowered,
variegated leaf pulmonaria (Jacob’s Ladder), and some stachys byzantina (Lamb’s Ears).
I at least can say I pumped a lot of money into the local economy.
I have no self control when it comes to plants!


I had enough time left to fashion a step out of scrap wood.

The tread is three pieces of a park bench we found
stuck in the muck of our stream bank when we bought our property.
My King suggested I make the front panel into a hinged door so I have storage.
Great idea.

Until next time, stay shabby!

I will be sharing this with:
Please come and see all the pretty entries!


.jpg)